- Details
- Written by: Stanko Milosev
- Category: WPF
- Hits: 6748
One example of button and textbox stretching together to fill view:
<Window x:Class="IoCtest.MainWindow"
        xmlns="http://schemas.microsoft.com/winfx/2006/xaml/presentation"
        xmlns:x="http://schemas.microsoft.com/winfx/2006/xaml"
        xmlns:local="clr-namespace:IoCtest"
        Title="MainWindow" Height="350" Width="525">
    <Grid OverridesDefaultStyle="True">
        <Grid.ColumnDefinitions>
            <ColumnDefinition Width="*" />
        </Grid.ColumnDefinitions>
        <Grid.RowDefinitions>
            <RowDefinition Height="*"></RowDefinition>
            <RowDefinition Height="30"></RowDefinition>
        </Grid.RowDefinitions>
        <TextBox Grid.Row="0" Grid.Column="0" TextWrapping="Wrap" Text="TextBox" AcceptsReturn="True"  HorizontalScrollBarVisibility="Visible" VerticalScrollBarVisibility="Visible"/>
        <Button Grid.Row="1" Content="Write to memo" Height="30" VerticalAlignment="Bottom"></Button>
    </Grid>
</Window>
Important lines to notice are:
<Grid.ColumnDefinitions>
	<ColumnDefinition Width="*" />
</Grid.ColumnDefinitions>
<Grid.RowDefinitions>
	<RowDefinition Height="*"></RowDefinition>
	<RowDefinition Height="30"></RowDefinition>
</Grid.RowDefinitions>
and attributes:
Grid.Row="0" Grid.Column="0"
and
Grid.Row="1" VerticalAlignment="Bottom"
- Details
- Written by: Stanko Milosev
- Category: WPF
- Hits: 8091
To write this article I was using this article.
To show examples of dependency injection, I will implement application which will on one button show some message and on the other button same that message it will save to file. Method for showing message will be called ShowMessage, method for saving mesage will be called WriteMessageToFile.
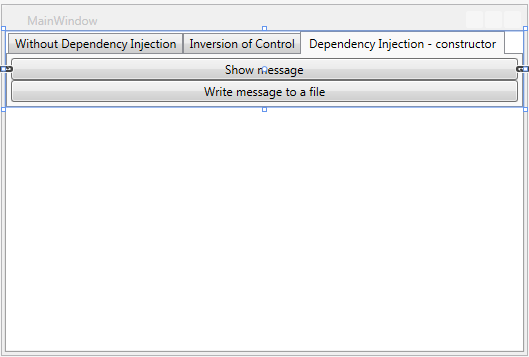
So, first I have created new WPF application and I called it DependencyInjectionExample. Then I prepared XAML, where I added page controls, with which I separated DI and non DI examples, so my XAML looks like this:
<Window x:Class="DependencyInjectionExample.MainWindow"
        xmlns="http://schemas.microsoft.com/winfx/2006/xaml/presentation"
        xmlns:x="http://schemas.microsoft.com/winfx/2006/xaml"
        Title="MainWindow" Height="350" Width="525">
    <Grid>
        <StackPanel>
            <TabControl>
                <TabItem Header="Without Dependency Injection">
                    <Grid Background="#FFE5E5E5">
                        <StackPanel>
                            <Button>
                                Show message
                            </Button>
                            <Button>
                                Write message to a file
                            </Button>
                        </StackPanel>
                    </Grid>
                </TabItem>
                <TabItem Header="Inversion of Control">
                    <Grid Background="#FFE5E5E5">
                        <StackPanel>
                            <Button>
                                Show message
                            </Button>
                            <Button>
                                Write message to a file
                            </Button>
                        </StackPanel>
                    </Grid>
                </TabItem>
                <TabItem Header="Dependency Injection - constructor">
                    <Grid Background="#FFE5E5E5">
                        <StackPanel>
                            <Button>
                                Show message
                            </Button>
                            <Button>
                                Write message to a file
                            </Button>
                        </StackPanel>
                    </Grid>
                </TabItem>
            </TabControl>
        </StackPanel>
    </Grid>
</Window>
My window now looks like this:
After that I prepared folders in which I will implement all my examples, so my solution looks like this: 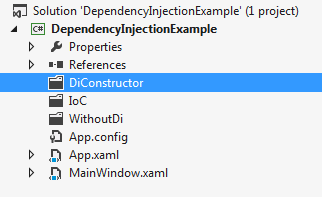
Second step is to create example without dependency injection. Since I am using MVVM approach, I will create ICommand functionality which I will attach it to XAML, as I already explained it here.
Idea is to have one class (in my case DoTheMessage), which will react on Notify method of same class - once to display message, once to save message to a file.
Class which reacts on button click looks like this:
public class WithoutDiViewModelShowMessage
{
	private ICommand _buttonCommand;
	DoTheMessageWithoutDi _doTheMessage = new DoTheMessageWithoutDi();


	public ICommand ButtonClick
	{
		get { return _buttonCommand; }
		set { _buttonCommand = value; }
	}

	public WithoutDiViewModelShowMessage()
	{
		ButtonClick = new RelayCommand(new Action<object>(_doTheMessage.ShowMesage));
	}
}

public class WithoutDiViewModelWriteMesage
{
	private ICommand _buttonCommand;
	DoTheMessage _doTheMessage = new DoTheMessage();


	public ICommand ButtonClick
	{
		get { return _buttonCommand; }
		set { _buttonCommand = value; }
	}

	public WithoutDiViewModelWriteMesage()
	{
		ButtonClick = new RelayCommand(new Action<object>(_doTheMessage.WriteMessage));
	}
}
Where part of XAML for writing / showing message without DI looks like this:
<TabItem Header="Without Dependency Injection">
	<Grid Background="#FFE5E5E5">
		<StackPanel>
			<StackPanel.Resources>
				<withoutDi:WithoutDiViewModelShowMessage x:Key="WithoutDiViewModelShowMessage" />
				<withoutDi:WithoutDiViewModelWriteMesage x:Key="WithoutDiViewModelWriteMesage" />
			</StackPanel.Resources>
			<Button DataContext="{StaticResource WithoutDiViewModelShowMessage}" Command="{Binding ButtonClick}">
				Show message
			</Button>
			<Button DataContext="{StaticResource WithoutDiViewModelWriteMesage}" Command="{Binding ButtonClick}">
				Write message to a file
			</Button>
		</StackPanel>
	</Grid>
</TabItem>
And class which actually show / write messages looks like this:
class ActOnMessage
{
	public void ShowMessage(string message)
	{
		MessageBox.Show(message);
	}

	public void WriteMessageToFile(object obj)
	{
		string _exePath = System.IO.Path.GetDirectoryName(System.Reflection.Assembly.GetEntryAssembly().Location);
		string _file = _exePath + "\\helloWorld.txt";
		try
		{
			TextWriter tw = new StreamWriter(_file);

			// write a line of text to the file
			tw.WriteLine("test");

			// close the stream
			tw.Close();
		}
		catch
		{
			MessageBox.Show("Unable to write file to: " + _file);
		}
		finally
		{
			MessageBox.Show("Mesage was successfully writen to: " + _file);
		}
	}
}

class DoTheMessageWithoutDi
{
	private ActOnMessage _actOnMessage = null;

	public void ShowMesage(object o)
	{
		if (_actOnMessage == null)
		{
			_actOnMessage = new ActOnMessage();
		}
		_actOnMessage.ShowMessage("Hello world!");
	}

	public void WriteMessage(object o)
	{
		if (_actOnMessage == null)
		{
			_actOnMessage = new ActOnMessage();
		}
		_actOnMessage.WriteMessageToFile("Hello world!");
	}
}
As you can see I had to write to methods (WithoutDiViewModelShowMessage and WithoutDiViewModelWriteMesage), under the "DoTheMessageWithoutDi" class for writing and showing messages, which is not good since I would like to have one class and one method which will react on the message.
Now lets see solution with Inversion of Control (IoC). My IoC.cs looks like this:
public interface INofificationAction
{
	void ActOnNotification(string message);
}

//showMessage implementation
class ShowMessage: INofificationAction
{
	public void ActOnNotification(string message)
	{
		MessageBox.Show(message);
	}
}

//writeMessageToFile implementation
class WriteMessageToFile : INofificationAction
{
	public void ActOnNotification(string message)
	{
		string _exePath = System.IO.Path.GetDirectoryName(System.Reflection.Assembly.GetEntryAssembly().Location);
		string _file = _exePath + "\\helloWorld.txt";
		try
		{
			TextWriter tw = new StreamWriter(_file);

			// write a line of text to the file
			tw.WriteLine("test");

			// close the stream
			tw.Close();
		}
		catch
		{
			MessageBox.Show("Unable to write file to: " + _file);
		}
		finally
		{
			MessageBox.Show("Mesage was successfully writen to: " + _file);
		}
	}
}

class DoTheMessageIoC
{
	private INofificationAction _actOnMessage = null;

	public void ShowMesage(object o)
	{
		if (_actOnMessage == null)
		{
			_actOnMessage = new ShowMessage();
		}
		_actOnMessage.ActOnNotification("Hello world!");
	}

	public void WriteMessage(object o)
	{
		if (_actOnMessage == null)
		{
			_actOnMessage = new WriteMessageToFile();
		}
		_actOnMessage.ActOnNotification("Hello world!");
	}
}
First I implemented interface (INofificationAction), and then on the end, I assigned different methods to a interface.
Now let us see how it will look like with dependecy injection - constructor injection.
This is how my model now looks like:
//interface
public interface INofificationAction
{
	void ActOnNotification(string message);
}

//showMessage implementation
class ShowMessage : INofificationAction
{
	public void ActOnNotification(string message)
	{
		MessageBox.Show(message);
	}
}

//writeMessageToFile implementation
class WriteMessageToFile : INofificationAction
{
	public void ActOnNotification(string message)
	{
		string _exePath = System.IO.Path.GetDirectoryName(System.Reflection.Assembly.GetEntryAssembly().Location);
		string _file = _exePath + "\\helloWorld.txt";
		try
		{
			TextWriter tw = new StreamWriter(_file);

			// write a line of text to the file
			tw.WriteLine("test");

			// close the stream
			tw.Close();
		}
		catch
		{
			MessageBox.Show("Unable to write file to: " + _file);
		}
		finally
		{
			MessageBox.Show("Mesage was successfully writen to: " + _file);
		}
	}
}

class DoTheMessageIoC
{
	private INofificationAction _actOnMessage = null;

	public DoTheMessageIoC(INofificationAction concreteImplementation)
	{
		this._actOnMessage = concreteImplementation;
	}

	public void Notify(object o)
	{
		_actOnMessage.ActOnNotification("Hello world!");
	}

}
As you can see last class (DoTheMessageIoC) has constructor which expects INofificationAction as parameter. And ViewModel now looks like:
public class DiConstructorViewModelShowMessage
{
	private static ShowMessage writer = new DependencyInjectionExample.DiConstructor.ShowMessage();
	private ICommand _buttonCommand;
	private DoTheMessageIoC _doTheMessage = new DoTheMessageIoC(writer);

	public ICommand ButtonClick
	{
		get { return _buttonCommand; }
		set { _buttonCommand = value; }
	}

	public DiConstructorViewModelShowMessage()
	{
		ButtonClick = new DiConstructorCommand(new Action<object>(_doTheMessage.Notify));
	}
}

public class DiConstructorViewModelWriteMesage
{
	private static WriteMessageToFile writer = new DependencyInjectionExample.DiConstructor.WriteMessageToFile();
	private ICommand _buttonCommand;
	private DoTheMessageIoC _doTheMessage = new DoTheMessageIoC(writer);

	public ICommand ButtonClick
	{
		get { return _buttonCommand; }
		set { _buttonCommand = value; }
	}

	public DiConstructorViewModelWriteMesage()
	{
		ButtonClick = new DiConstructorCommand(new Action<object>(_doTheMessage.Notify));
	}
}
Here you can see for showMessage example:
private static ShowMessage writer = new DependencyInjectionExample.DiConstructor.ShowMessage();
private ICommand _buttonCommand;
private DoTheMessageIoC _doTheMessage = new DoTheMessageIoC(writer);
Example you can download from here (VS 2012).
- Details
- Written by: Stanko Milosev
- Category: WPF
- Hits: 5353
First model:
public class FirstModel
{
	public string HelloWorld { get; set; }
	public FirstModel()
	{
		HelloWorld = "First model";
	}
}
Second model:
public class SecondModel
{
	public string HelloWorld { get; set; }

	public SecondModel()
	{
		HelloWorld = "Second model";
	}
}
XAML:
<Window x:Class="TwoDataContext.MainWindow"
        xmlns="http://schemas.microsoft.com/winfx/2006/xaml/presentation"
        xmlns:x="http://schemas.microsoft.com/winfx/2006/xaml"
        xmlns:system="clr-namespace:System;assembly=mscorlib"
        xmlns:twoDataContext="clr-namespace:TwoDataContext"
        Title="MainWindow" Height="350" Width="525">
    <Grid>
        <Grid.Resources>
            <twoDataContext:FirstModel x:Key="FirstModel" />
            <twoDataContext:SecondModel x:Key="SecondModel" />
        </Grid.Resources>
        <TextBox DataContext = "{StaticResource FirstModel}" HorizontalAlignment="Left" Height="23" Margin="178,64,0,0" TextWrapping="Wrap" Text="{Binding HelloWorld}" VerticalAlignment="Top" Width="120"/>
        <TextBox DataContext = "{StaticResource SecondModel}" HorizontalAlignment="Left" Height="23" Margin="178,120,0,0" TextWrapping="Wrap" Text="{Binding HelloWorld}" VerticalAlignment="Top" Width="120"/>

    </Grid>
</Window>
Example you can download from here.
- Details
- Written by: Stanko Milosev
- Category: WPF
- Hits: 16644
Let's first add RelayCommand class:
class RelayCommand: ICommand
{
	private Action<object> _action;

	public RelayCommand(Action<object> action)
	{
		_action = action;
	}

	public bool CanExecute(object parameter)
	{
		return true;
	}

	public void Execute(object parameter)
	{
		if (parameter != null)
		{
			_action(parameter);
		}
		else
		{
			_action("Hello world");
		}
	}

	public event EventHandler CanExecuteChanged;
}
ICommand is an interface, and automatically you will receive methods which you have to implement. Now "click model":
public class MVVMButtonClickViewModel
{
	public MVVMButtonClickViewModel()
	{
		MVVMClick = new RelayCommand(new Action<object>(ShowMessage));
	}

	private ICommand m_ButtonCommand;

	public ICommand MVVMClick
	{
		get { return m_ButtonCommand; }
		set { m_ButtonCommand = value; }
	}

	public void ShowMessage(object obj)
	{
		MessageBox.Show("Test");
	}

}
and XAML:
<Window x:Class="MVVMButtonClick.MainWindow"
        xmlns="http://schemas.microsoft.com/winfx/2006/xaml/presentation"
        xmlns:x="http://schemas.microsoft.com/winfx/2006/xaml"
        xmlns:local="clr-namespace:MVVMButtonClick.ViewModel"
        Title="MainWindow" Height="350" Width="525">
    <Window.DataContext>
        <local:MVVMButtonClickViewModel />
    </Window.DataContext>
    <Grid>
        <Button Content="Button" HorizontalAlignment="Left" Margin="247,134,0,0" VerticalAlignment="Top" Width="75" Command="{Binding MVVMClick}"/>
    </Grid>
</Window>
As you can see, in button node, we have attribute like: Command="{Binding MVVMClick}, and of course don't forget to add DataContext, like:
    <Window.DataContext>
        <local:MVVMButtonClickViewModel />
    </Window.DataContext>
Example you can download from here.