- Details
- Written by: Stanko Milosev
- Category: WPF
- Hits: 5481
All you need is one XAML and two text boxes. So here goes XAML:
<Window x:Class="WpfApplication3.MainWindow"
        xmlns="http://schemas.microsoft.com/winfx/2006/xaml/presentation"
        xmlns:x="http://schemas.microsoft.com/winfx/2006/xaml"
        Title="MainWindow" Height="350" Width="525">
    <Grid>
        <TextBox HorizontalAlignment="Left" Height="23" Margin="96,91,0,0" TextWrapping="Wrap" Text="{Binding Path=Text, ElementName=myTest}" VerticalAlignment="Top" Width="120"/>
        <TextBox HorizontalAlignment="Left" Height="23" Margin="120,200,0,0" TextWrapping="Wrap" Text="TextBox" VerticalAlignment="Top" Width="120" x:Name="myTest"/>
    </Grid>
</Window>
- Details
- Written by: Stanko Milosev
- Category: WPF
- Hits: 5036
XAML:
<Window x:Class="WpfApplication2.MainWindow"
        xmlns="http://schemas.microsoft.com/winfx/2006/xaml/presentation"
        xmlns:x="http://schemas.microsoft.com/winfx/2006/xaml"
        Title="MainWindow" Height="350" Width="525">
    <Grid>
        <TextBox x:Name="t1" HorizontalAlignment="Left" Height="23" Margin="101,43,0,0" TextWrapping="Wrap" Text="TextBox" VerticalAlignment="Top" Width="120"/>
        <TextBox x:Name="t2" HorizontalAlignment="Left" Height="23" Margin="101,91,0,0" TextWrapping="Wrap" Text="TextBox" VerticalAlignment="Top" Width="120"/>
    </Grid>
</Window>
Code:
        public MainWindow()
        {
            InitializeComponent();
            Binding binding = new Binding();
            binding.Source = t1;
            binding.Path = new PropertyPath(TextBox.TextProperty);
            BindingOperations.SetBinding(t2, TextBox.TextProperty, binding);
        }
- Details
- Written by: Stanko Milosev
- Category: WPF
- Hits: 5287
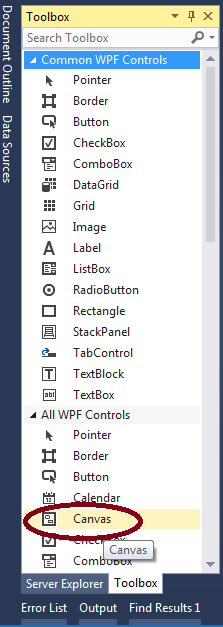
First add a canvas:
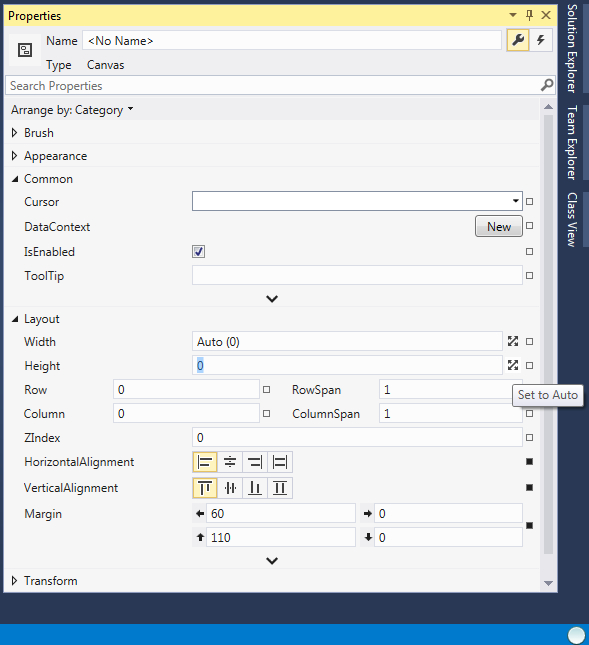
Set width and height to auto:
Add a button.
Now comes a tricky part, at least for me, since I don't know how to delete margins from Visual Studio GUI, so I had to do it manually from XAML. So, here is my XAML:
<Window x:Class="DragNdrop.MainWindow"
        xmlns="http://schemas.microsoft.com/winfx/2006/xaml/presentation"
        xmlns:x="http://schemas.microsoft.com/winfx/2006/xaml"
        Title="MainWindow" Height="350" Width="525">
    <Grid>
        <Canvas Margin="20" HorizontalAlignment="Left" VerticalAlignment="Top">
            <Button Content="Button"
                    PreviewMouseLeftButtonDown="Button_PreviewMouseLeftButtonDown"
                    PreviewMouseLeftButtonUp="Button_PreviewMouseLeftButtonUp"
                    PreviewMouseMove="Button_PreviewMouseMove"/>
        </Canvas>
    </Grid>
</Window>
Notice that margins from button node are deleted, and margin is equal 20 on canvas (Margin="20"), otherwise button will be away from mouse pointer.
Code looks like this:
public partial class MainWindow : Window
{
	private double FirstXPos;
	private double FirstYPos;
	private double FirstArrowXPos;
	private double FirstArrowYPos;
	private object MovingObject;
	public MainWindow()
	{
		InitializeComponent();
	}

	private void Button_PreviewMouseLeftButtonDown(object sender, MouseButtonEventArgs e)
	{
		FirstXPos = e.GetPosition(sender as Control).X;
		FirstYPos = e.GetPosition(sender as Control).Y;
		FirstArrowXPos = e.GetPosition((sender as Control).Parent as Control).X - FirstXPos - 20;
		FirstArrowYPos = e.GetPosition((sender as Control).Parent as Control).Y - FirstYPos - 20;
		MovingObject = sender;
	}

	private void Button_PreviewMouseLeftButtonUp(object sender, MouseButtonEventArgs e)
	{
		MovingObject = null;
	}

	private void Button_PreviewMouseMove(object sender, MouseEventArgs e)
	{
		if (e.LeftButton == MouseButtonState.Pressed && sender == MovingObject)
		{
			(sender as Control).SetValue(Canvas.LeftProperty,
				 e.GetPosition((sender as Control).Parent as Control).X - FirstXPos - 20);

			(sender as Control).SetValue(Canvas.TopProperty,
				 e.GetPosition((sender as Control).Parent as Control).Y - FirstYPos - 20);
		}
	}
}
Code you can download from here, dirty as usual and made in VS 2013
- Details
- Written by: Stanko Milosev
- Category: WPF
- Hits: 5197
<Grid>
	<TextBox Height="194" HorizontalAlignment="Stretch" Name="textBox1" VerticalAlignment="Bottom" TextWrapping="Wrap" AcceptsReturn="True" />
</Grid>
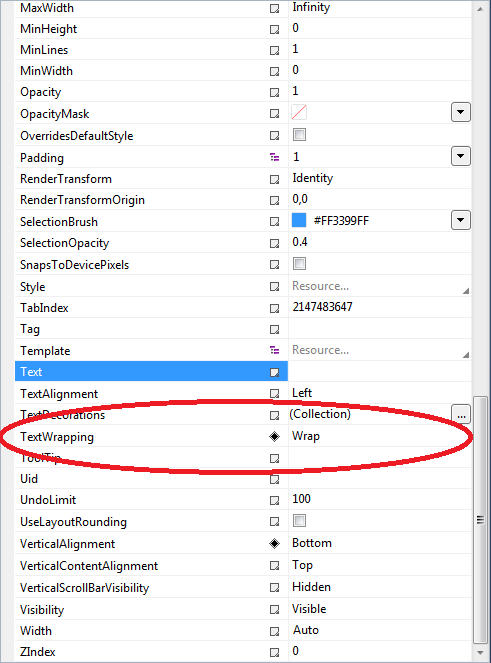
Most important values are:
TextWrapping="Wrap"
and
AcceptsReturn="True"
Or in properties:

and