
- Details
- Written by: Stanko Milosev
- Category: Ubuntu
- Hits: 23
If you want to have Nginx on same machine where Mailcow, then rather install first Nginx, like I explained here
This guide explains how to install Mailcow on a clean Ubuntu installation.
In this example the Mailcow hostname is:
mail.localmilosev.com
Replace the hostname, domain name and IP address with your own values where necessary.
1. Update Ubuntu
Update the package list:
sudo apt update
Upgrade all installed packages:
sudo apt upgrade -y
Restart Ubuntu:
sudo reboot
2. Install curl
Install curl:
sudo apt install curl -y
Verify the installation:
curl --version
3. Install Docker and Git
Install Docker, Docker Compose and Git:
sudo apt install -y docker.io docker-compose-v2 git
Restart Ubuntu (recommended):
sudo reboot
Enable Docker:
sudo systemctl enable docker
Start Docker:
sudo systemctl start docker
Verify the installation:
sudo systemctl status docker
docker --version
docker compose version
4. Download Mailcow
Go to the installation directory:
cd /opt
Clone the Mailcow repository:
sudo git clone https://github.com/mailcow/mailcow-dockerized
5. Generate the Mailcow Configuration
Open the Mailcow directory:
cd /opt/mailcow-dockerized
Run the configuration generator:
sudo ./generate_config.sh
When asked for the hostname, enter:
mail.localmilosev.com
Select the stable branch:
1
6. Download and Start Mailcow
Download all Docker images:
sudo docker compose pull
This may take several minutes.
Before starting Mailcow if you already installed Nginx, then change the port for Mailcow:
cd /opt/mailcow-dockerized
sudo nano mailcow.conf
Search with help of Ctrl+W for HTTP_PORT or HTTPS_PORT, and change it to like:
HTTP_PORT=8080
HTTPS_PORT=8443
Start Mailcow:
sudo docker compose up -d
Wait a few minutes until all containers are initialized.
7. Check the Logs
Check the PHP-FPM container log:
sudo docker compose logs --tail=100 php-fpm-mailcow
You can also check whether all containers are running:
sudo docker compose ps
8. Recreate the Containers if Necessary
If Mailcow does not start correctly:
cd /opt/mailcow-dockerized
Stop the containers and remove the Docker volumes:
sudo docker compose down --volumes
Delete the Docker volume that stores Mailcow's MariaDB database
docker volume rm mailcowdockerized_mysql-vol-1
Download the images again:
sudo docker compose pull
Start Mailcow:
sudo docker compose up -d
Restart Ubuntu:
sudo reboot
9. Configure the Hosts File
Edit the hosts file:
sudo nano /etc/hosts
Add the following line:
192.168.138.130 mail.localmilosev.com
Your hosts file should look similar to this:
127.0.0.1 localhost
127.0.1.1 ubuntu
192.168.138.130 mail.localmilosev.com
Replace 192.168.138.130 with your server's IP address.
Save the file with Ctrl+S and exit with Ctrl+X.
10. Open the Administration Interface
Open the following URL in your browser:
https://mail.localmilosev.com/admin/
The default administrator credentials are:
Username: admin
Password: moohoo
11. Reset the Administrator Password
If necessary, reset the password:
cd /opt/mailcow-dockerized
sudo ./helper-scripts/mailcow-reset-admin.sh
12. Add Your Email Domain
Navigate to:
- Configuration
- Add Domain
Add your domain:
localmilosev.com
13. Create a Mailbox
Navigate to:
- Configuration
- Mailboxes
- Add Mailbox
Create your mailbox by entering the email address, password and mailbox quota.
Installation Complete
Your Mailcow installation is now available at:
https://mail.localmilosev.com/ or https://mail.localmilosev.com:8443/admin/dashboardFor a production installation, remember to configure:
- DNS A records
- MX records
- SPF
- DKIM
- DMARC
- Reverse DNS (PTR)
- A firewall
- Valid TLS certificates
- Details
- Written by: Stanko Milosev
- Category: Ubuntu
- Hits: 28036
To write this article I am using this web site.
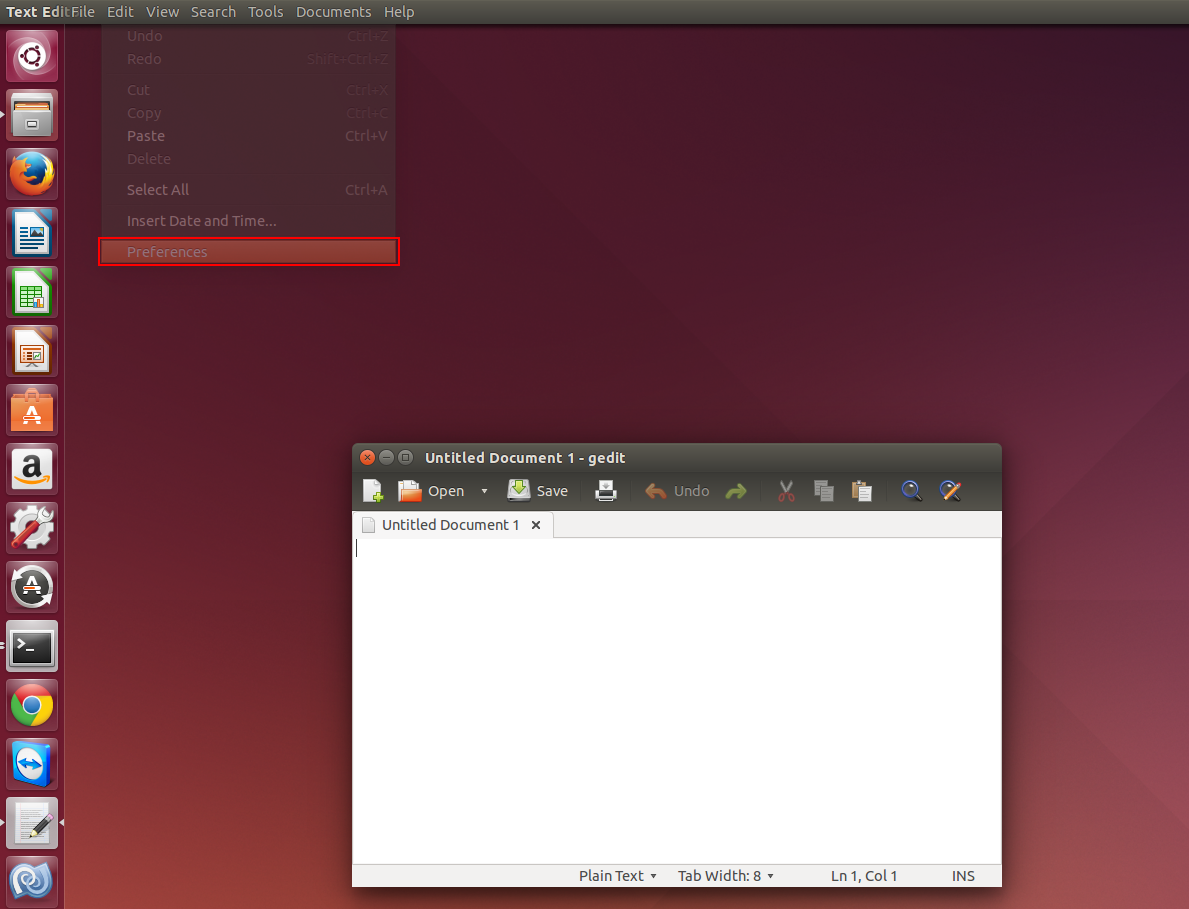
Open Gedit, and while Gedit window is active go to Edit -> Preferences:
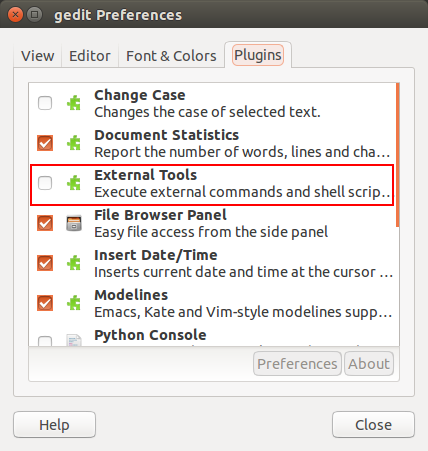
Go to plugins and check external tools:
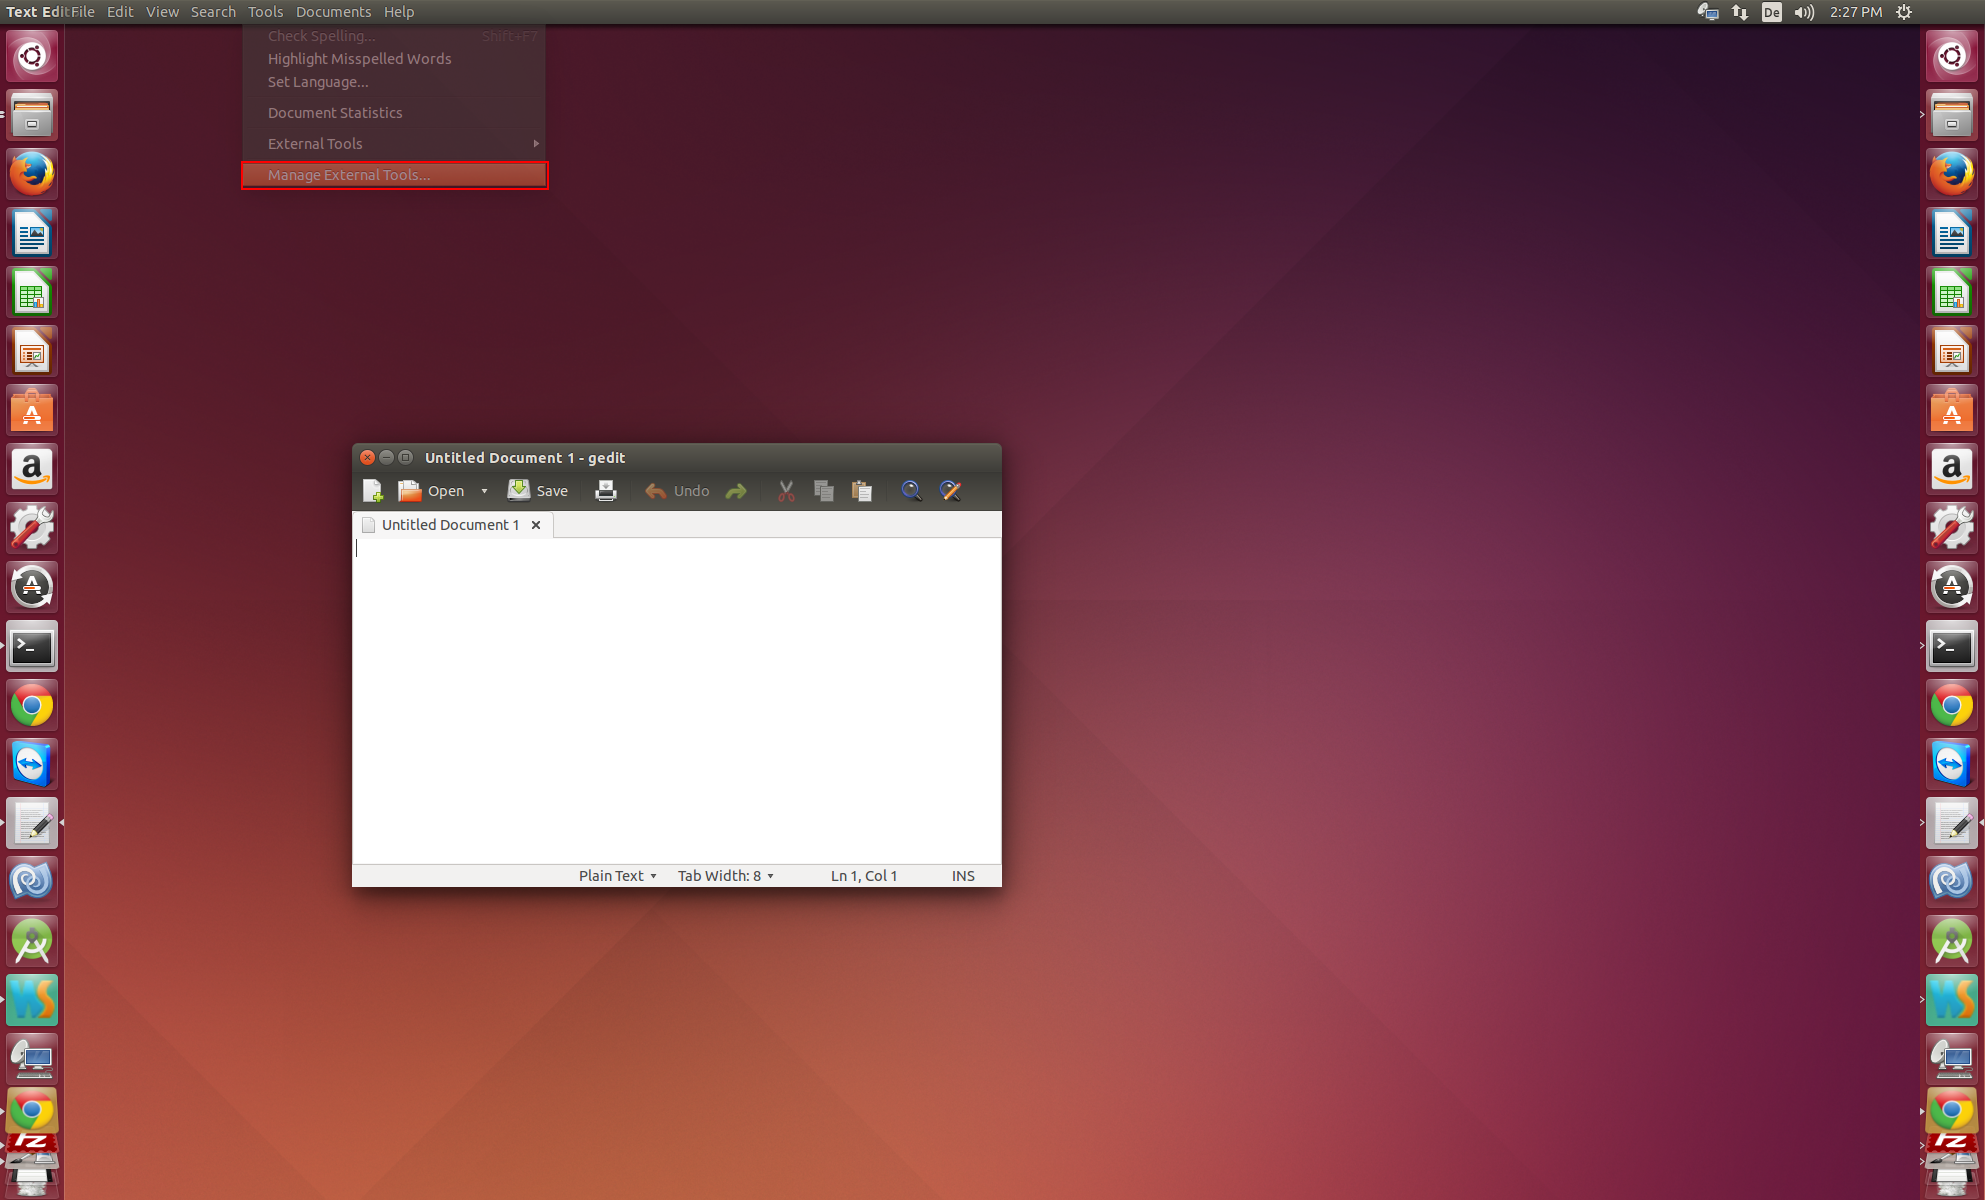
Now open Manage External Tools:
Click add:
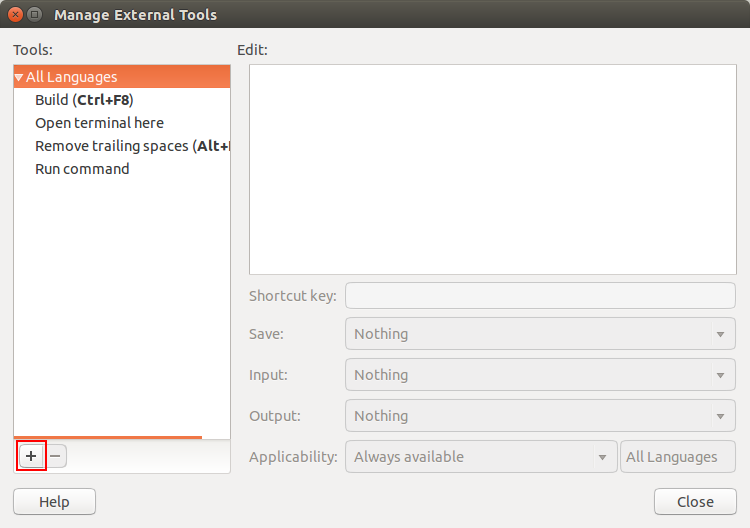
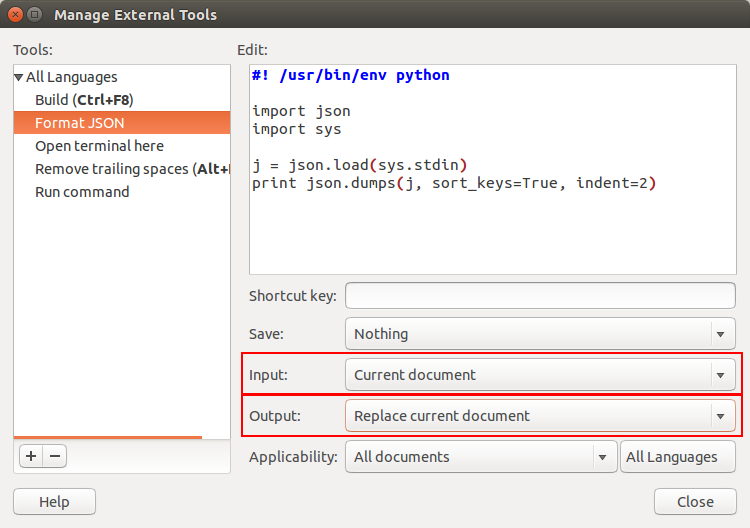
Enter a name (Format JSON), paste this text:
#! /usr/bin/env python
import json
import sys
j = json.load(sys.stdin)
print json.dumps(j, sort_keys=True, indent=2)
Set Input to Current document and set Output to Replace current document:
- Details
- Written by: Stanko Milosev
- Category: Ubuntu
- Hits: 12546
So, list of applications which I am using at this moment on Ubuntu:
Pinta - sudo apt-get install pinta
Filezilla - sudo apt-get install filezilla
Searchmonkey - sudo apt-get install searchmonkey
RabbitVCS - installation instructions
nautilus-open-terminal - sudo apt-get install nautilus-open-terminal
- Details
- Written by: Stanko Milosev
- Category: Ubuntu
- Hits: 12207
I am using this web site for this article.
Open terminal (ctrl + alt +t), and write:
1. sudo apt-key adv --keyserver hkp://keyserver.ubuntu.com:80 --recv-keys 3FA7E0328081BFF6A14DA29AA6A19B38D3D831EF
2. echo "deb http://download.mono-project.com/repo/debian wheezy main" | sudo tee /etc/apt/sources.list.d/mono-xamarin.list
3. sudo apt-get update
4. sudo apt-get install mono-complete
5. sudo apt-get install monodevelop
6. monodevelop
Now you should see screen of MonoDevelop...