To create my first test in Selenium, I was using this web site.
Download and install Eclipse, download Chrome driver, download and install Maven.
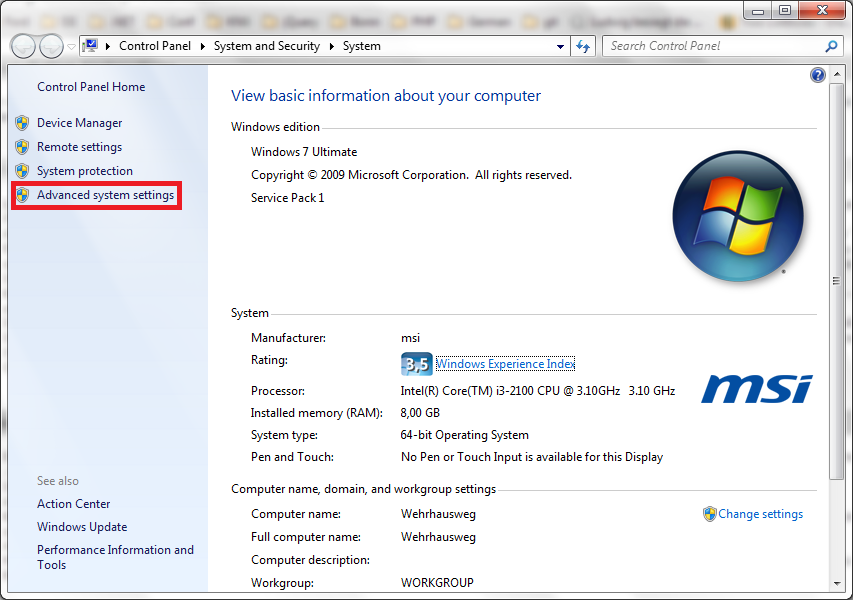
To install Maven, in my case, I downloaded apache-maven-3.2.2-bin.zip, and I extracted it to C:\opt\maven. After that on the keyboard click Windows sign + Pause, system properties should open, and click Advanced Settings. On Windows 7 it looks like this:
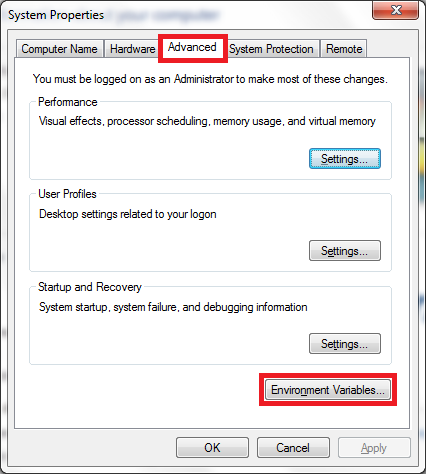
System properties window should pop - up, click on Advanced -> Environment Variables:
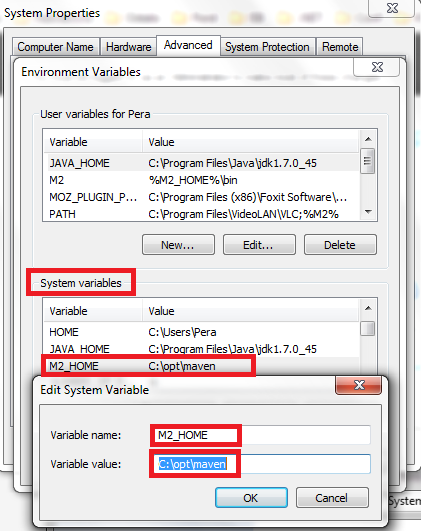
Environment Variables should pop - up. First I had to add M2_HOME variable with the value C:\opt\maven into system variables, because with user variables didn't work, I don't know why:
Then in user variables click new:
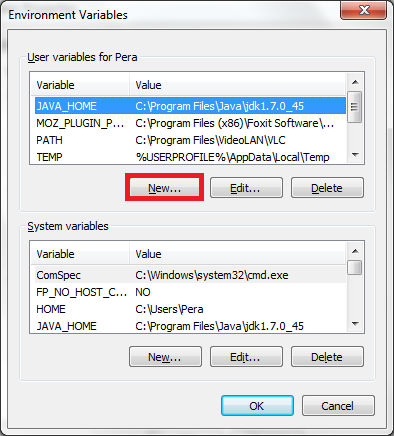
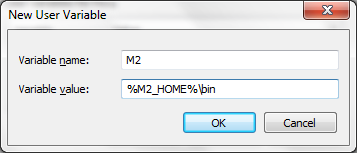
Add the M2 environment variable in the user variables with the value %M2_HOME%\bin
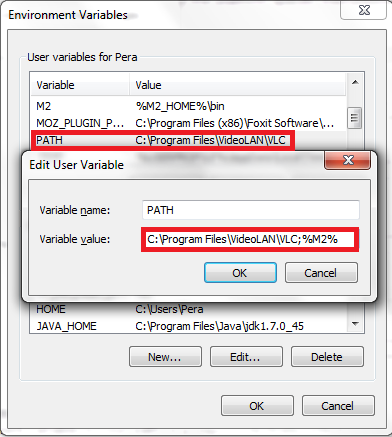
Add / update path variable, by adding %M2%:
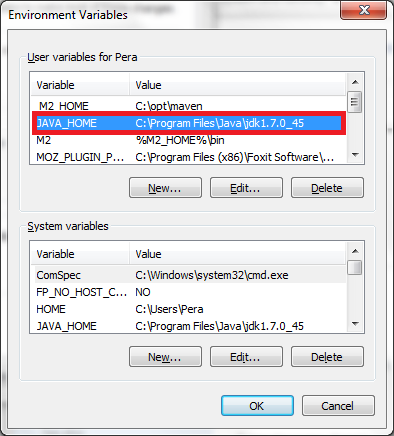
Make sure that Java_Home exists:
After adding all those variables, I had to restart my computer, then to check if everything is correctly set in command line write
echo %M2_HOME%
result should be (in my case):
C:\opt\maven
Now we can check if Maven is installed by writing in command line:
mvn --version
Result should be something like:
Apache Maven 3.2.2 (45f7c06d68e745d05611f7fd14efb6594181933e; 2014-06-17T15:51:42+02:00)
Maven home: C:\opt\maven
Java version: 1.7.0_45, vendor: Oracle Corporation
Java home: C:\Program Files\Java\jdk1.7.0_45\jre
Default locale: en_US, platform encoding: Cp1250
OS name: "windows 7", version: "6.1", arch: "amd64", family: "windows"
To start with Maven, create folder for example d:\com.milosev.app, open command line in that folder, execute:
mvn archetype:generate -DgroupId=com.milosev.app -DartifactId=my-firstTest -DarchetypeArtifactId=maven-archetype-quickstart -DinteractiveMode=false
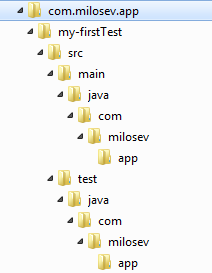
Now your folder structure should look like:
Open Eclipse, go to Help -> Install New Software:

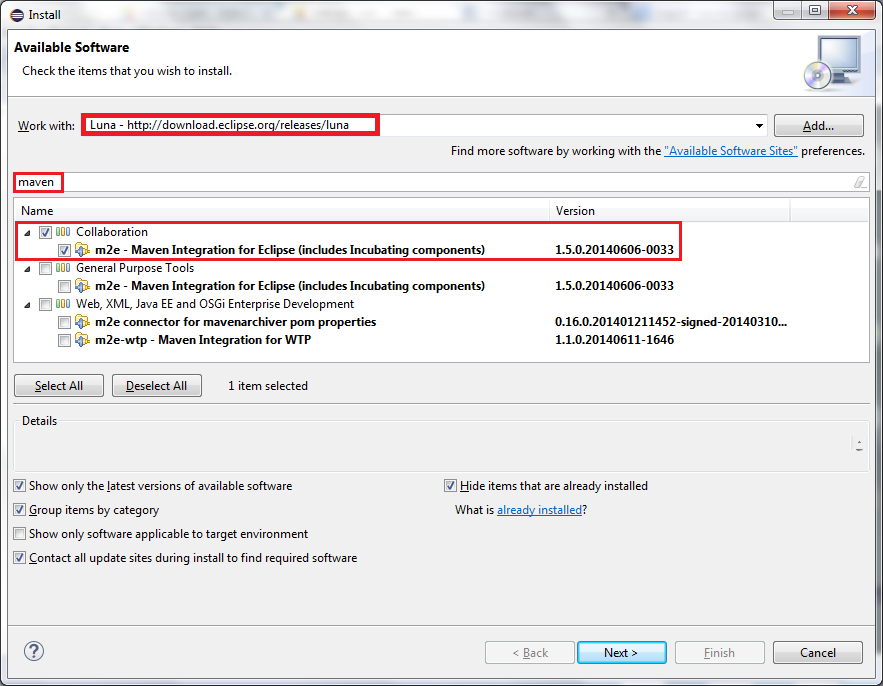
Then, in my case, I've choose Work with: Luna - http://download.eclipse.org/releases/Luna, filtered by maven, and check Collaboration m2e...:
Click Next -> Next -> Accept license agreement -> Finish, wait to install software, restart Eclipse.
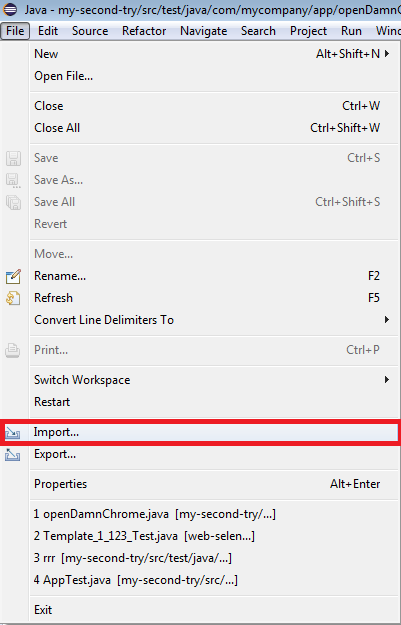
Go to File -> Import
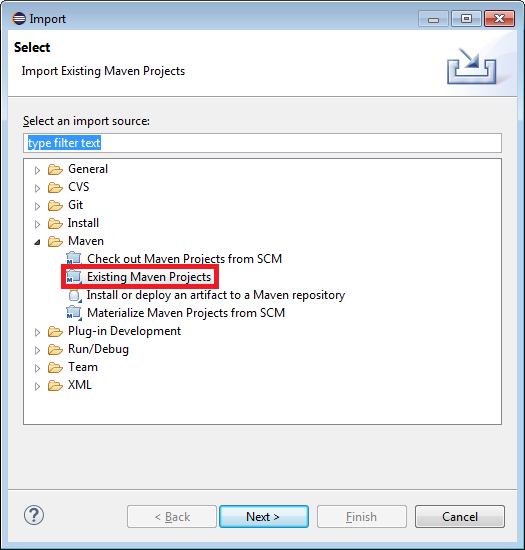
Then choose Existing Maven Projects
Click Browse go to folder where is your project (in my case that is d:\com.milosev.app), click ok -> Finish.
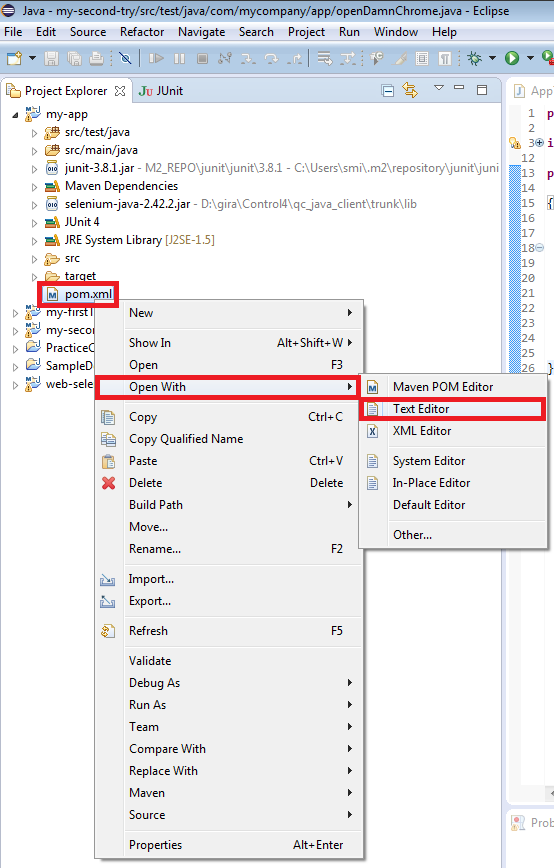
Open pom.xml, since I am unexpirienced Eclipse user I open it with Text Editor:
It should look like:
<project xmlns="http://maven.apache.org/POM/4.0.0" xmlns:xsi="http://www.w3.org/2001/XMLSchema-instance" xsi:schemaLocation="http://maven.apache.org/POM/4.0.0 http://maven.apache.org/maven-v4_0_0.xsd">
	<modelVersion>4.0.0</modelVersion>
	<groupId>com.mycompany.app</groupId>
	<artifactId>my-app</artifactId>
	<packaging>jar</packaging>
	<version>1.0-SNAPSHOT</version>
	<name>my-app</name>
	<url>http://maven.apache.org</url>
	<dependencies>

		<dependency>
			<groupId>junit</groupId>
			<artifactId>junit</artifactId>
			<version>3.8.1</version>
			<scope>test</scope>
		</dependency>

		<dependency>
			<groupId>org.seleniumhq.selenium</groupId>
			<artifactId>selenium-java</artifactId>
			<version>2.40.0</version>
		</dependency>

	</dependencies>
</project>
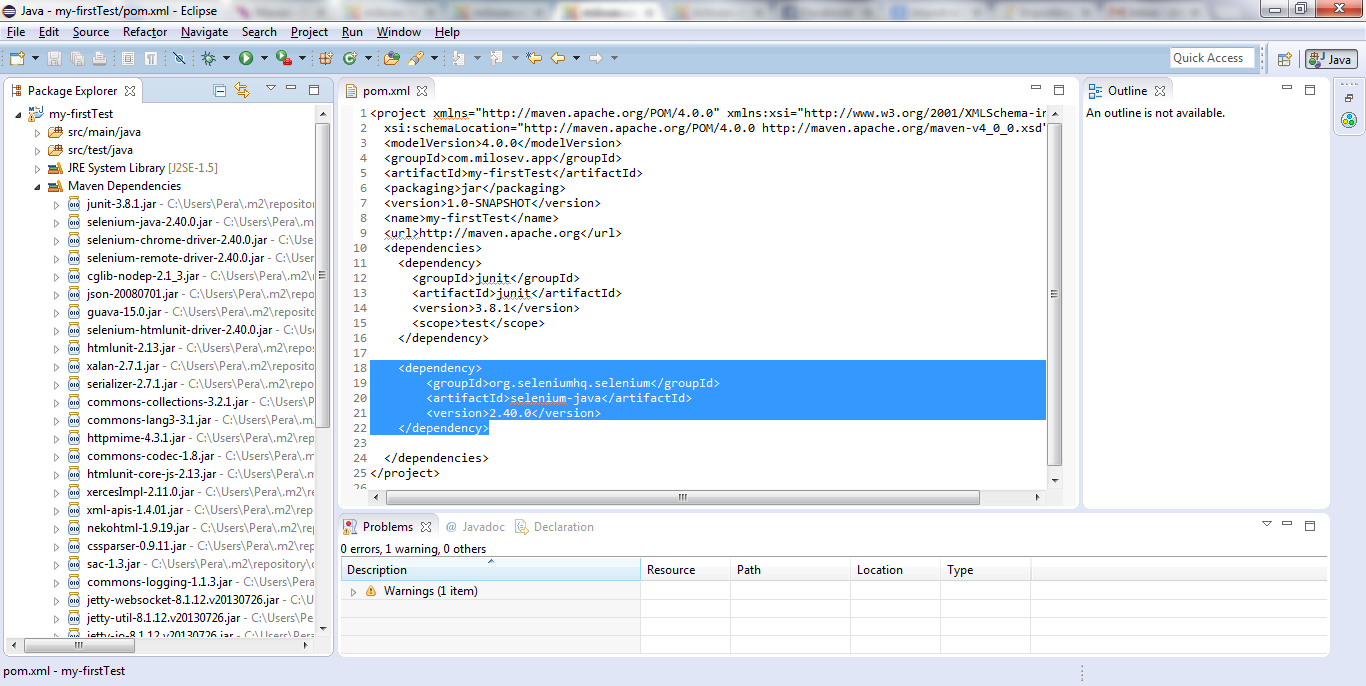
Basically you will need to add just:
<dependency>
	<groupId>org.seleniumhq.selenium</groupId>
	<artifactId>selenium-java</artifactId>
	<version>2.40.0</version>
</dependency>
After saving, Maven Dependencies should be populated, in my case it looks something like:
Now, open my-firstTest -> src/test/java -> com.milosev.app -> AppTest.java, right click on com.milosev.app -> New -> Class
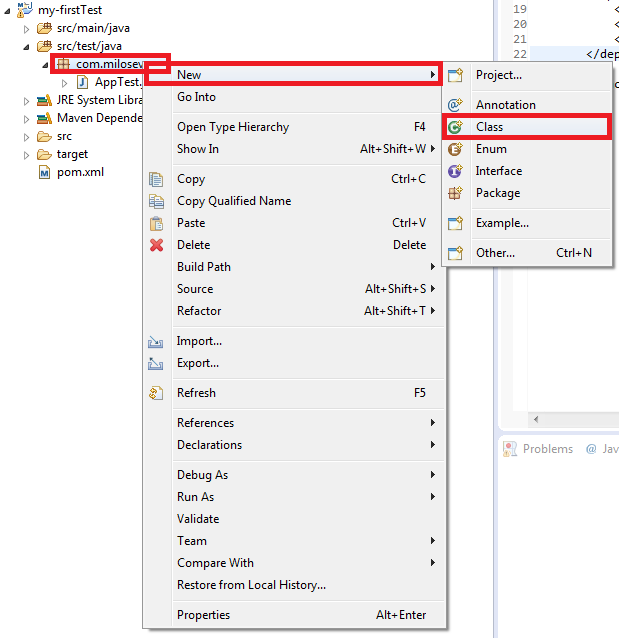
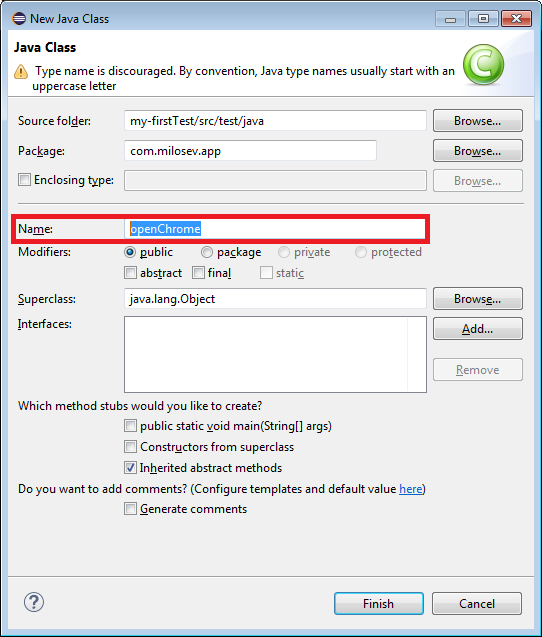
Give the name like openChrome
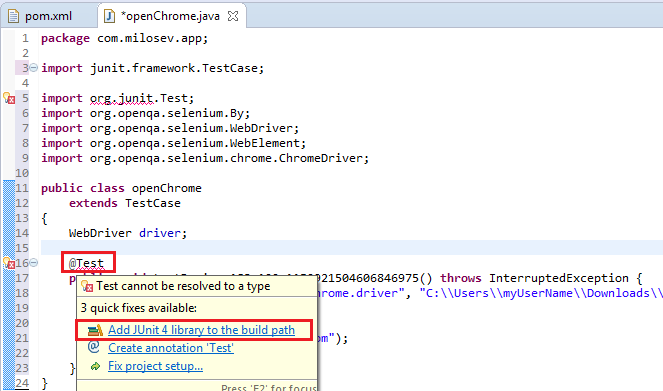
Open your new file, in my case openChrome.java, and write something like:
package com.milosev.app;

import junit.framework.TestCase;

import org.junit.Test;
import org.openqa.selenium.By;
import org.openqa.selenium.WebDriver;
import org.openqa.selenium.WebElement;
import org.openqa.selenium.chrome.ChromeDriver;

public class openChrome
	extends TestCase
{
	WebDriver driver;

	@Test
	public void testDevice_183_102_1152921504606846975() throws InterruptedException {
		System.setProperty("webdriver.chrome.driver", "C:\\Users\\myUserName\\Downloads\\chromedriver_win32\\chromedriver.exe");
		driver = new ChromeDriver();

		driver.get("http://www.google.com");
		assertTrue(true);
	}
}
Part C:\\Users\\myUserName\\Downloads\\chromedriver_win32\\chromedriver.exe change with path where you downloaded your chromedriver.
After adding the code, there is possibility that @Test will be underlined with red color, which means that it is not recognized. In that case go with mouse over @Test, wait for drop down window, and click on "Add JUnit 4 library to the building path":
Click F11, and magic should happen.
Example project you can download from here, but be aware that this is my very first project made in Selenium / Java.